POLYETHERMIDE, POLYETHERMIDE, POLYETHERMIDE!
All, like many others. Anyone who endeavors down the 3d printer road will soon discover the art of keeping your part secured on the print bed long enough to complete. and also not so stuck to the print bed its impossible to remove. Then theirs the types of plastic, types of enclosures. the combinations are endless. ME? I print mostly with ABS. ABS has a huge shrink factor which makes it prone to lifting off the printer bed surface and either completely coming loose, and or warping and in any case other than staying put end up in a useless part.
While their are many possible solutions to each print. the print operator tries to make it as simple and reliable as possible to complete any print. Me? I have tried no heat…. (ends up lifting and or warping), Hair spray? not strong enough same failure, Glue stick? this has been my most reliable solution but I would say depending on the part? some small lifting/warping, Sanding the surface of the print bed, also a heated bed. Fans? huge mistake… then I read about PEI the real name of this plastic is Polyethermide. This material is solely developed by SABIC . Another similar product is called ULTEM and is in the PEI family. more can be read about its properties here WIKIPEDIA.
Moving on . My print bed is approximately 9″x12″ (and its heated) 24V heater laminated to an aluminum plate. Then the glass print surface sits on top. I keep it clean until ready to print. and typically apply several layers of Elmers purple glue stick. (This is now the PAST!)
PARTS REQUIRED:
I set out to find some PEI. It seems Amazon had it cheaper than anywhere I could source it. even 50% cheaper than my wholesale supplier! This is the precise PEI product I ordered. (Amazon PEI link), as well as some High temp double sided tape. Same location (Amazon 3m link). Armed with the 2 items. I decided NOT to use my current glass surface. As its a piece of Neoceram. My thoughts were: What if this doesn’t work? I did not want to have to deal with possibly breaking my current work surface. So, I cut some 1/8″ mirror material to use as the test piece. (** Notes about my order. the PEI claimed to be 12″x24″ when it arrived it was infact 11-3/4″ x 23-3/4″. the 3m was as advertised.)
Installation:
I mixed up some soapy water in a sprayer. and mated the parts as if they were window tint. and laid one side of the 3m adhesive to the mirror. waited a day for it to somewhat dry. and followed up with the PEI to the other side. thus having a GLASS/doubled sided tape then the PEI. Also worth mentioning the PEI has a different surface finish on either side. One is glass smooth and the other is a very very light pebble. I went with the smooth side up. I waited 2 days for it to dry.
First test run setup:
My first test run would consist of many small parts. their known to fall off easily. Also some long straight tall parts. their infamous for lifting/warping. I planned on printing all the parts at a high speed (low quality) as no rafting. no glue just the bed heated to 100c which is my typical heat. Right after hitting start. I discover’d I forgot to remove the rafting. (1 layer 2 passes.) I thought well lets let it go anyways. And the results? NO lifting, warping nada! it stuck like hell! in fact possibly to well. After the print. I let the parts cool down with some forced fan air. 10mins later I really had to pull the heck out of the parts to get them free. Also with no visible signs of any damage to the PEI surface. this stuff works. I think my next test will be to see if I can secure a thicker piece and or come up with some way of being able to flex the work surface to aid in releasing the part. who knows?
Results?
Absolute success! I’m more than satisfied with this material. if your even having issues with your abs prints. This is your solution. though YMMV! Mine was a home run!
Ill add: My print bed construction allows for a quick change out of surfaces. So, if the day comes and I encounter some scenario where its advantageous to use plain glass or Aluminum I can do the switch within seconds.
I took a short vid of the parts getting printed. to show it in action. as well as the materials involved. I hope this helps you get the job done!. Now go melt some plastic.
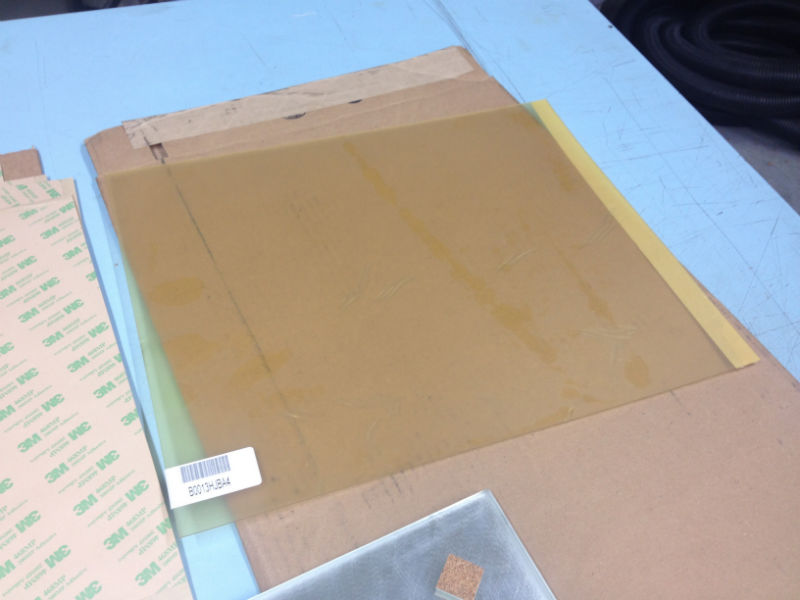
(Above) the drop from the PEI ordered.
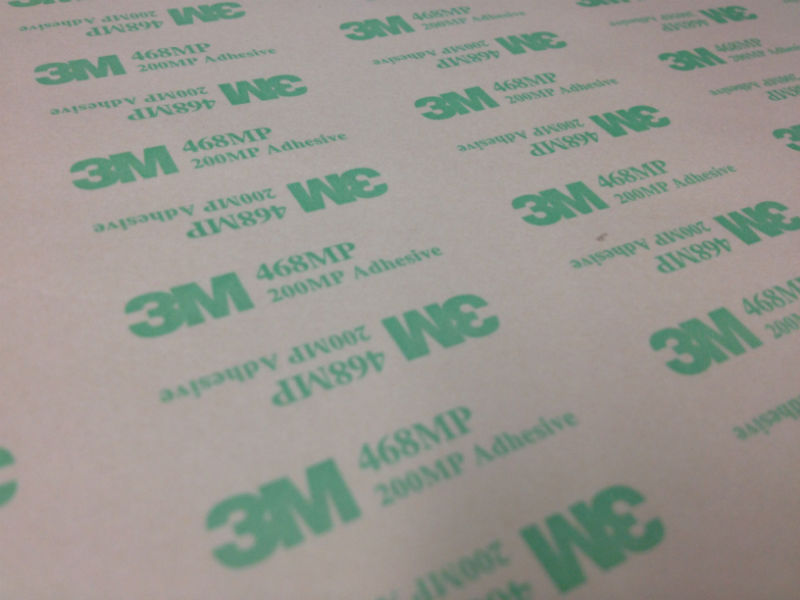
(Above) a closeup of the 3m branded adhesive
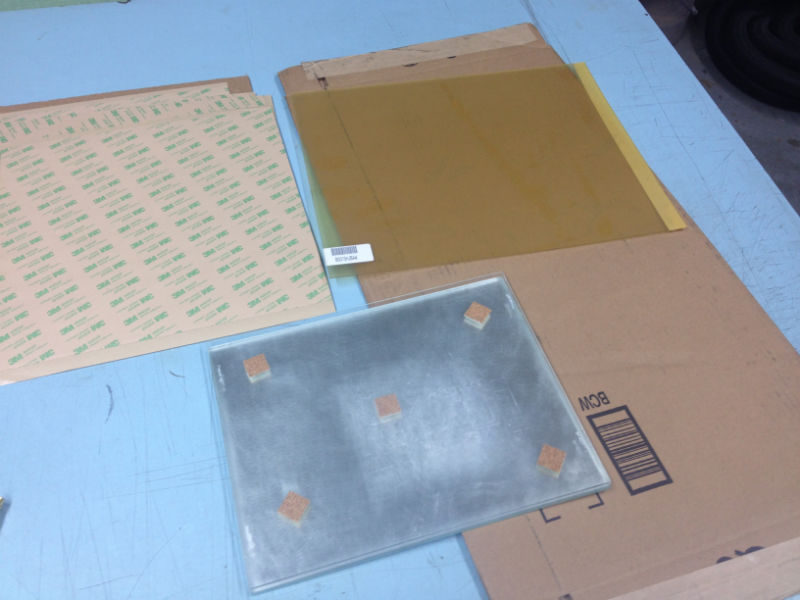
(Above)This is my current print surface. sitting directly on top of a mirror. so its hard to see the 9×12 Neocram.
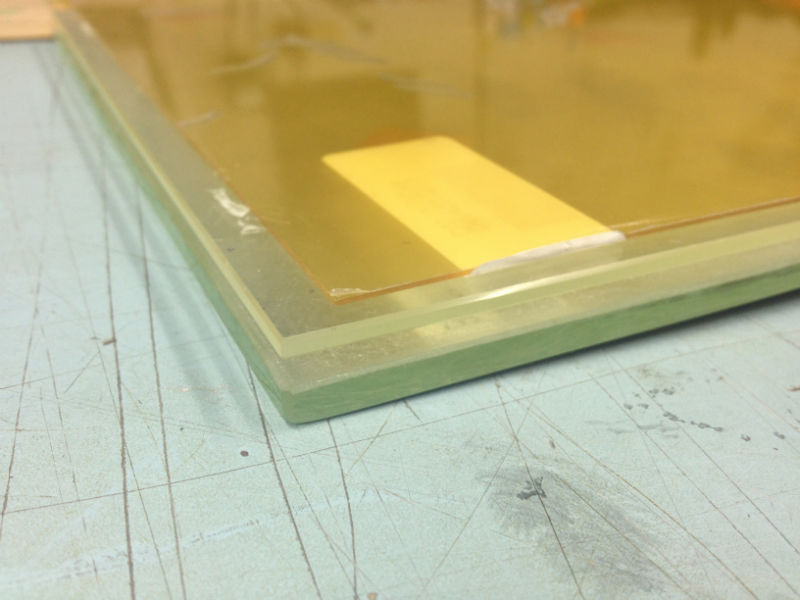
(Above) Bottom to top: 1/4″ mirror, 3mm Neocram, .03″ Polyethermide the PEI ships with a protective skin on the smooth side. (at least min did.)
(BELOW) Short Youtube vid 1 is from the back side and the other from the front side. not to exciting but I thought it worth seeing the parts I test with.