Atlas 10 Lathe TailStock mods (improvements)
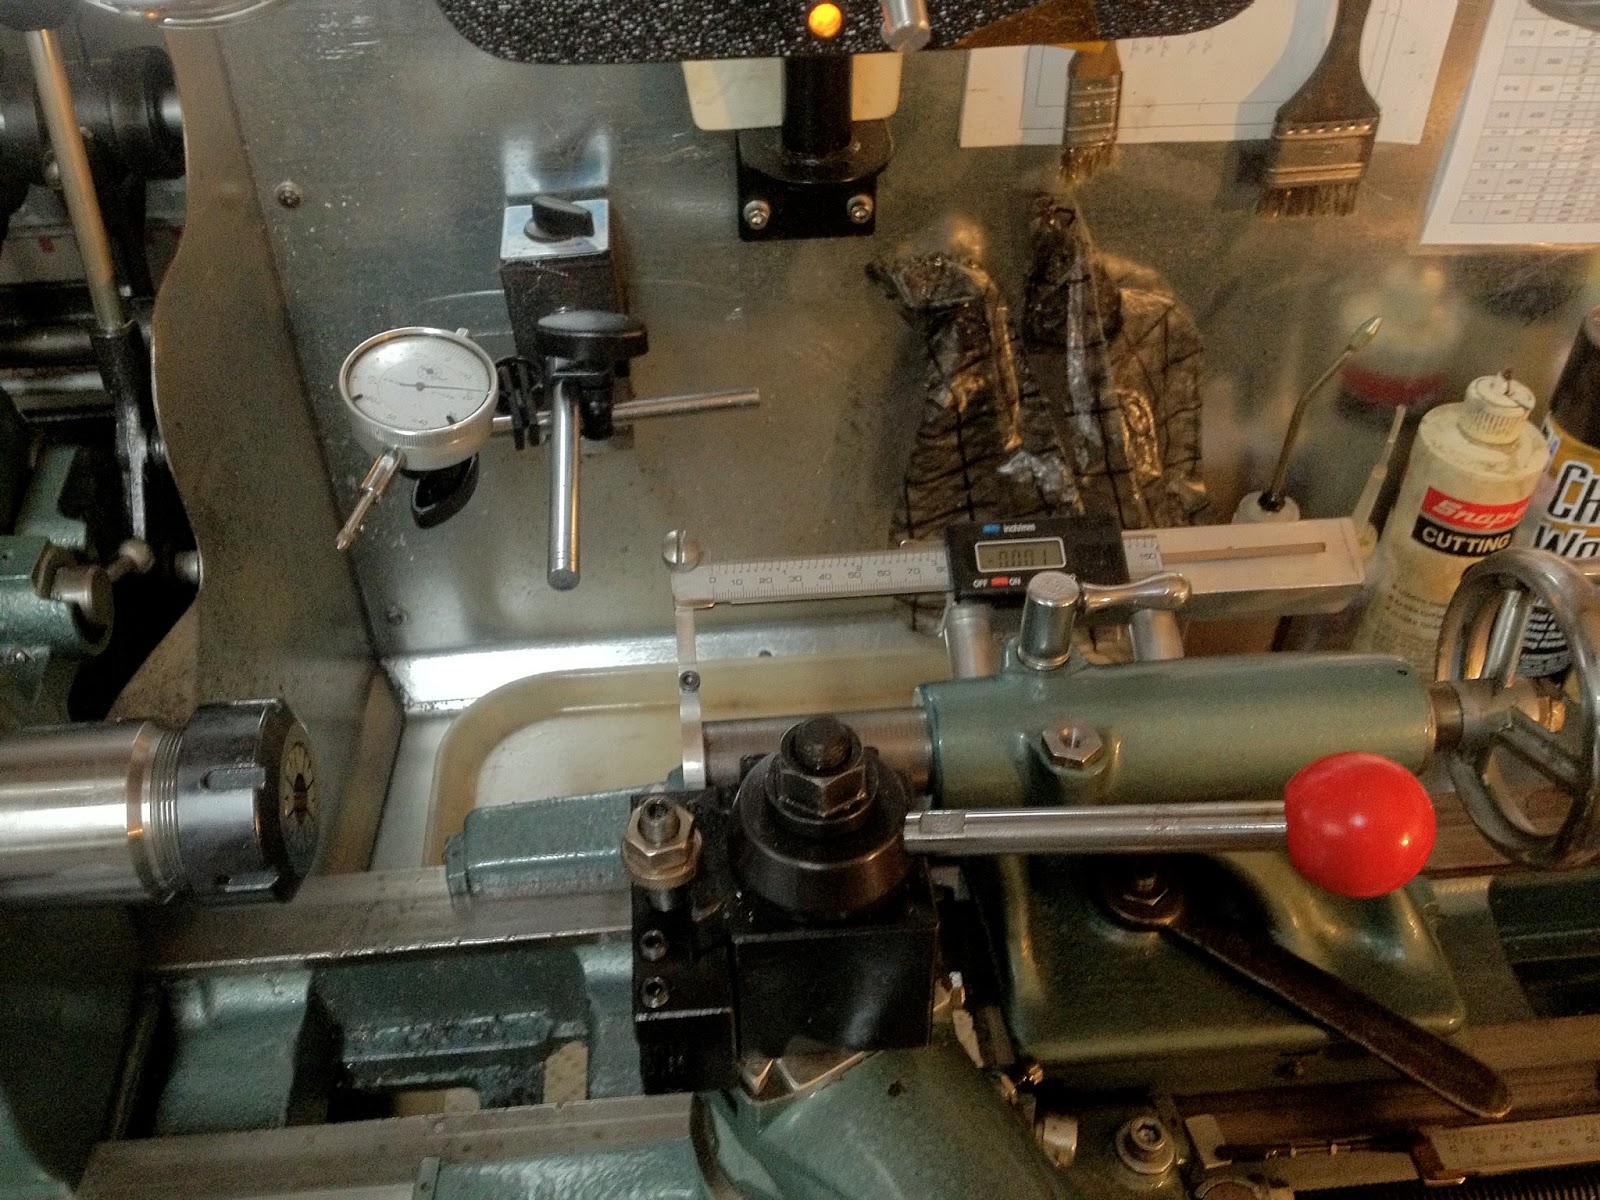
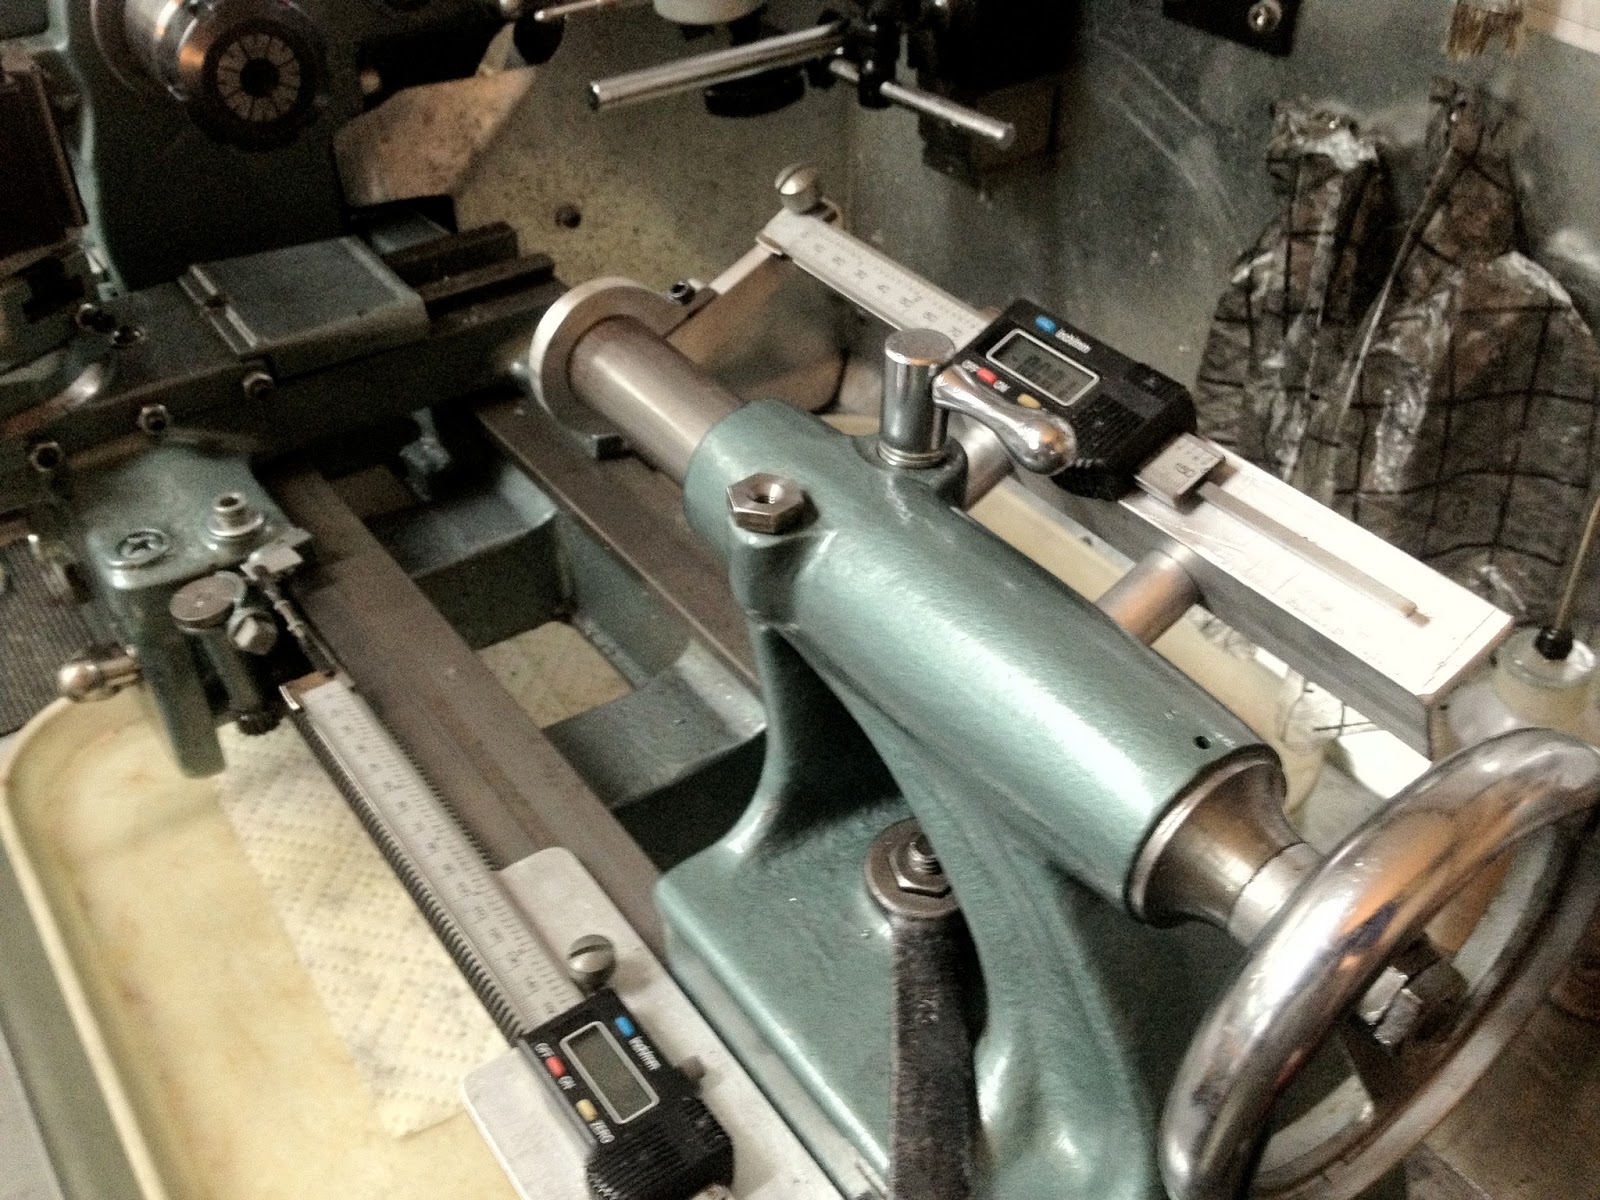
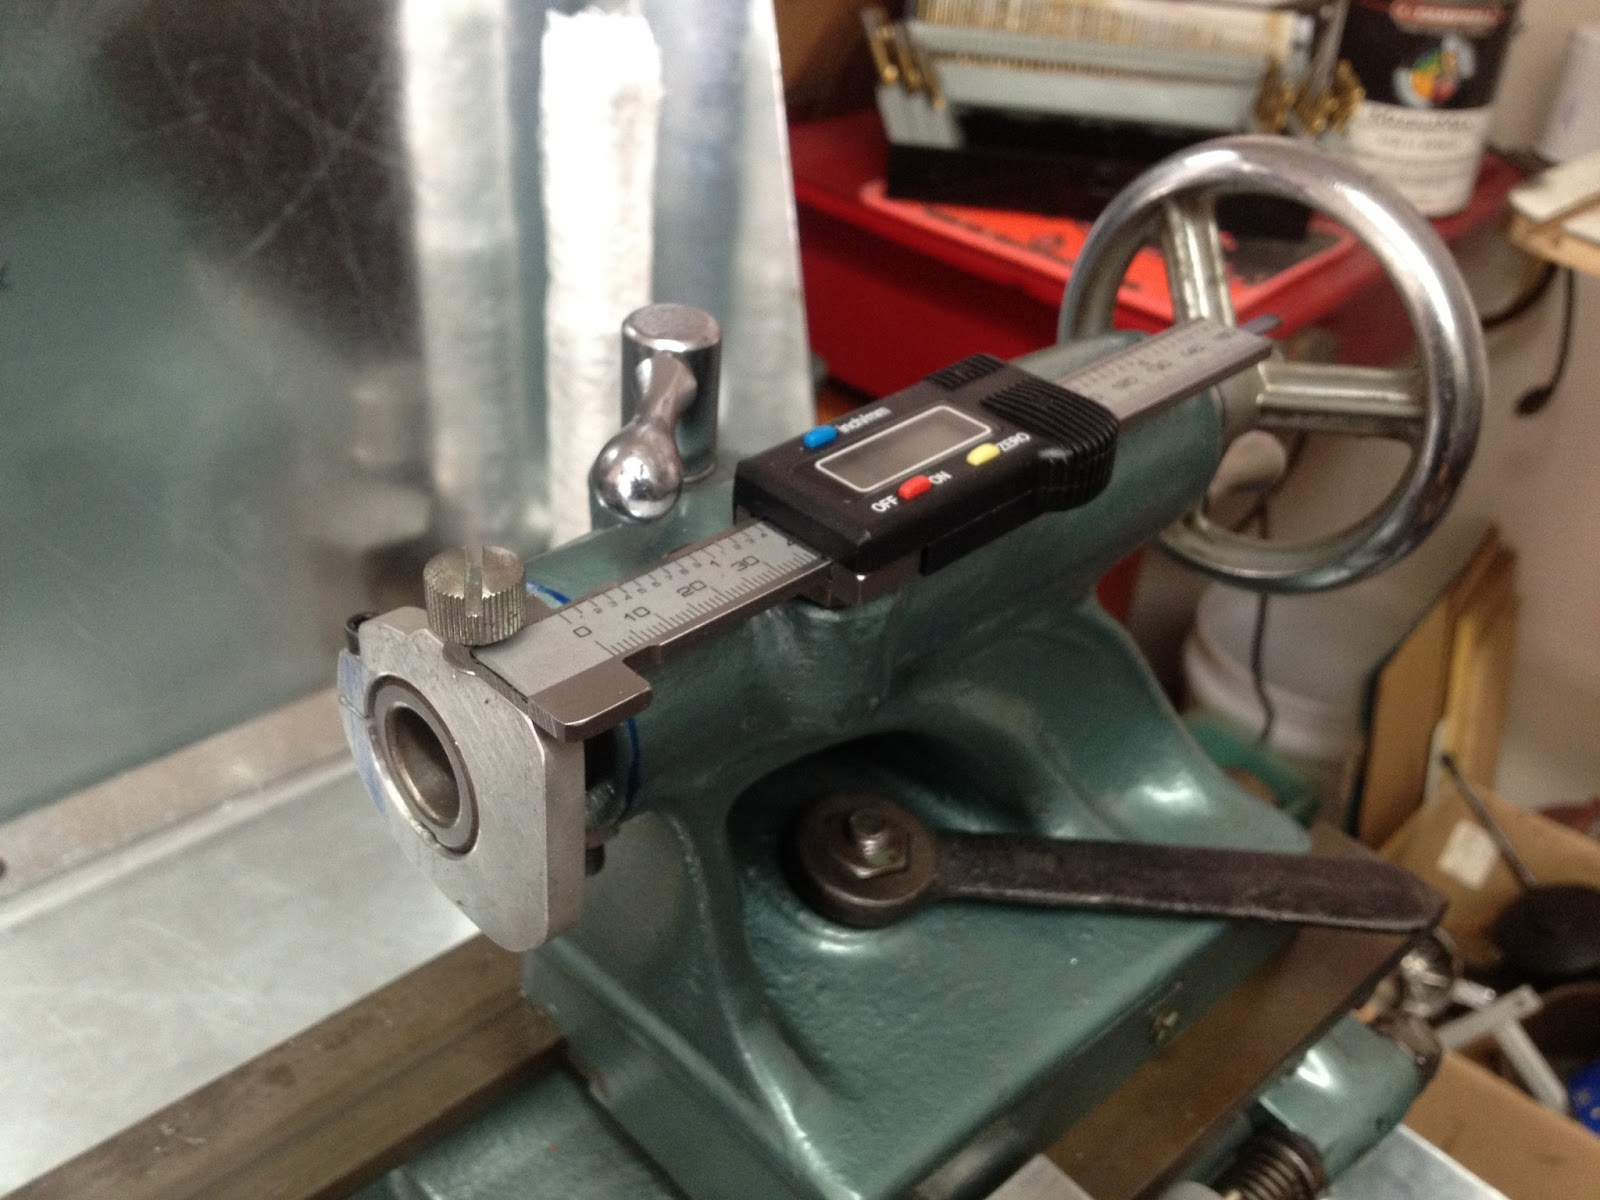
Well I figured I would put up some shots of my tailstock.
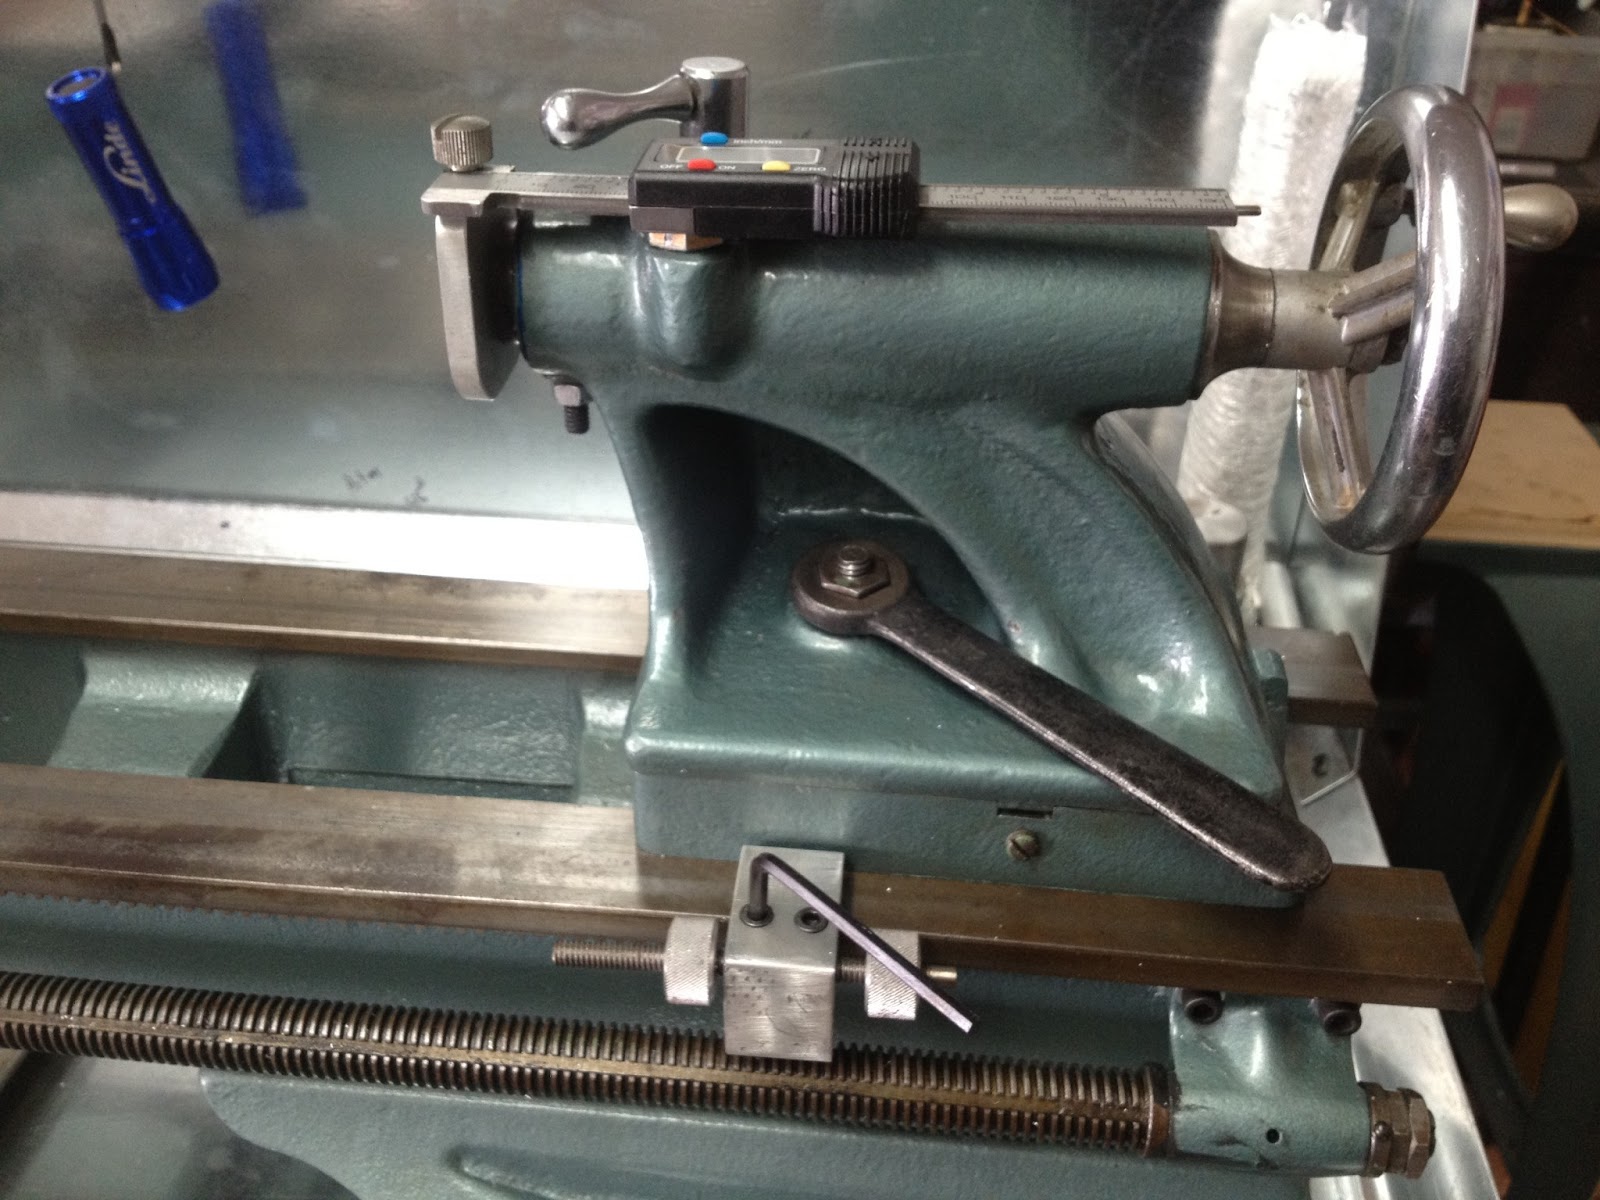
The DRO is a $9.95 Harbor freight special. When they go on sale for 9.95 I usually buy 5 or so sets
and hack them up for various tool improvements or save them up for christmas presents.
All the materials used in my mods were left over or what I had on hand. so no real need to
get exactly the same. I encourage the re use of old parts laying around when possible.
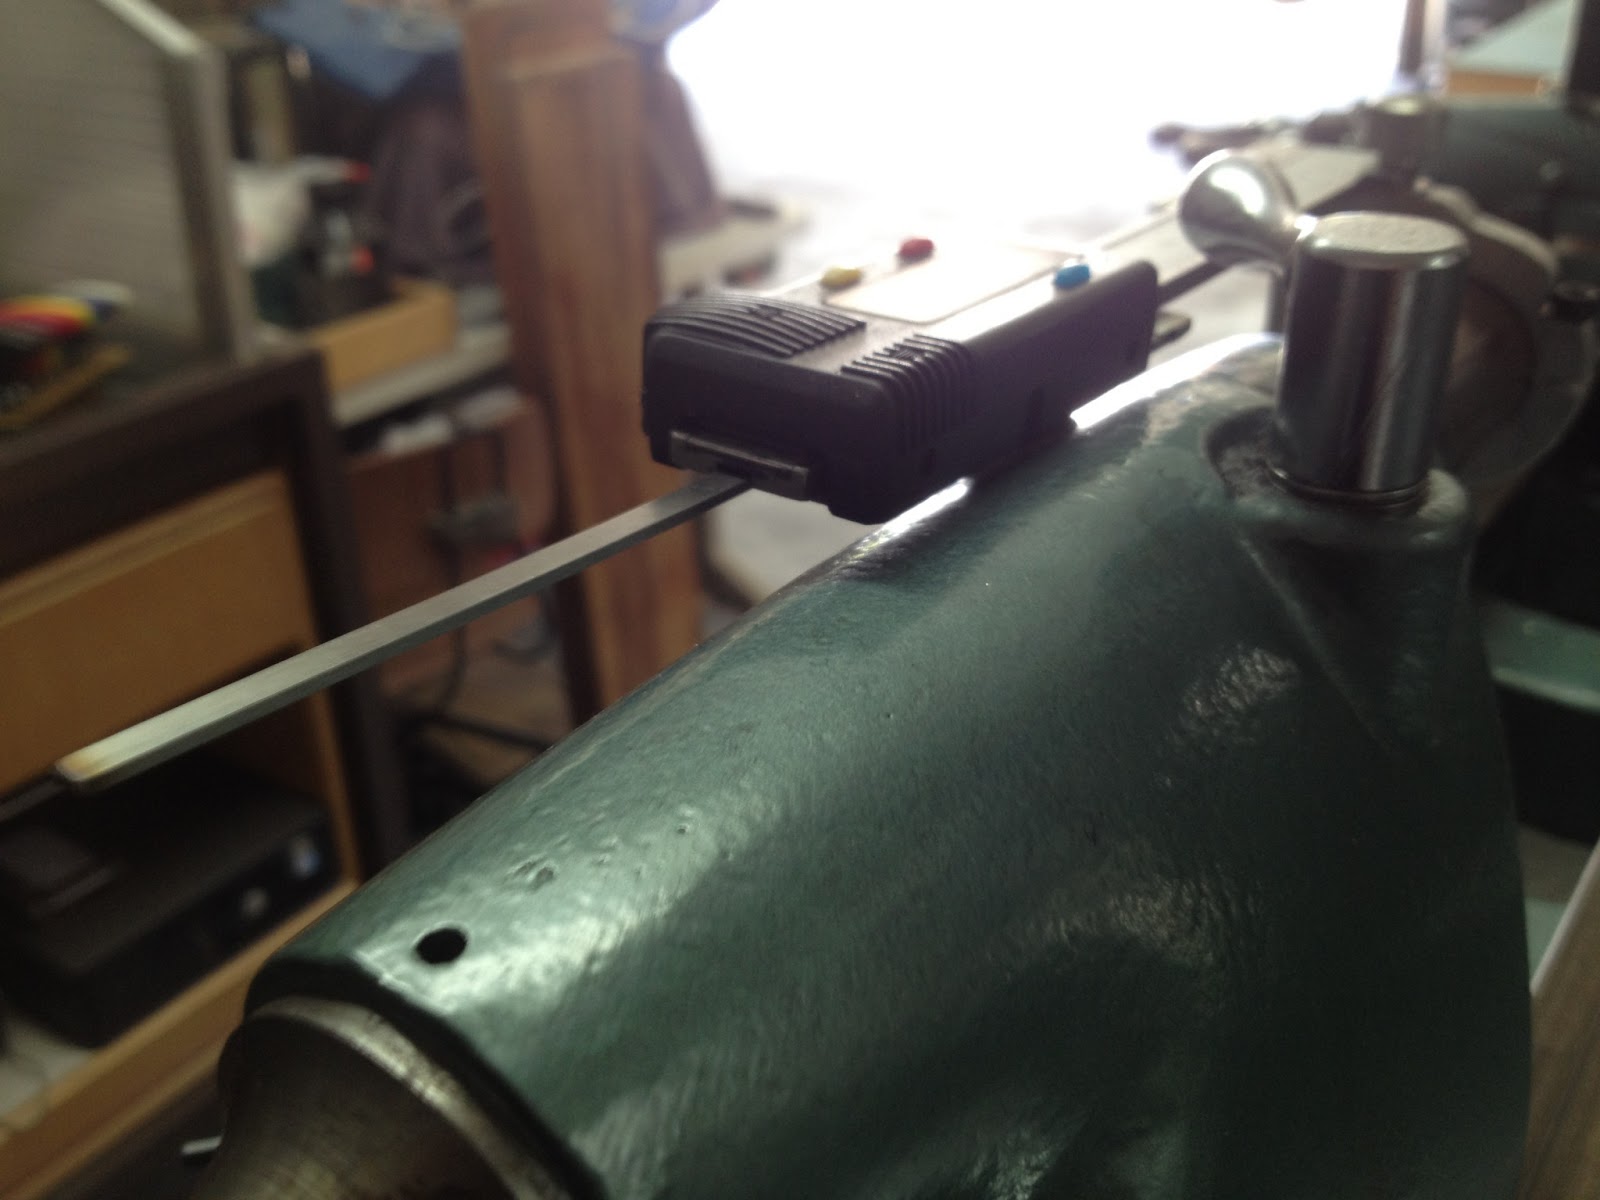
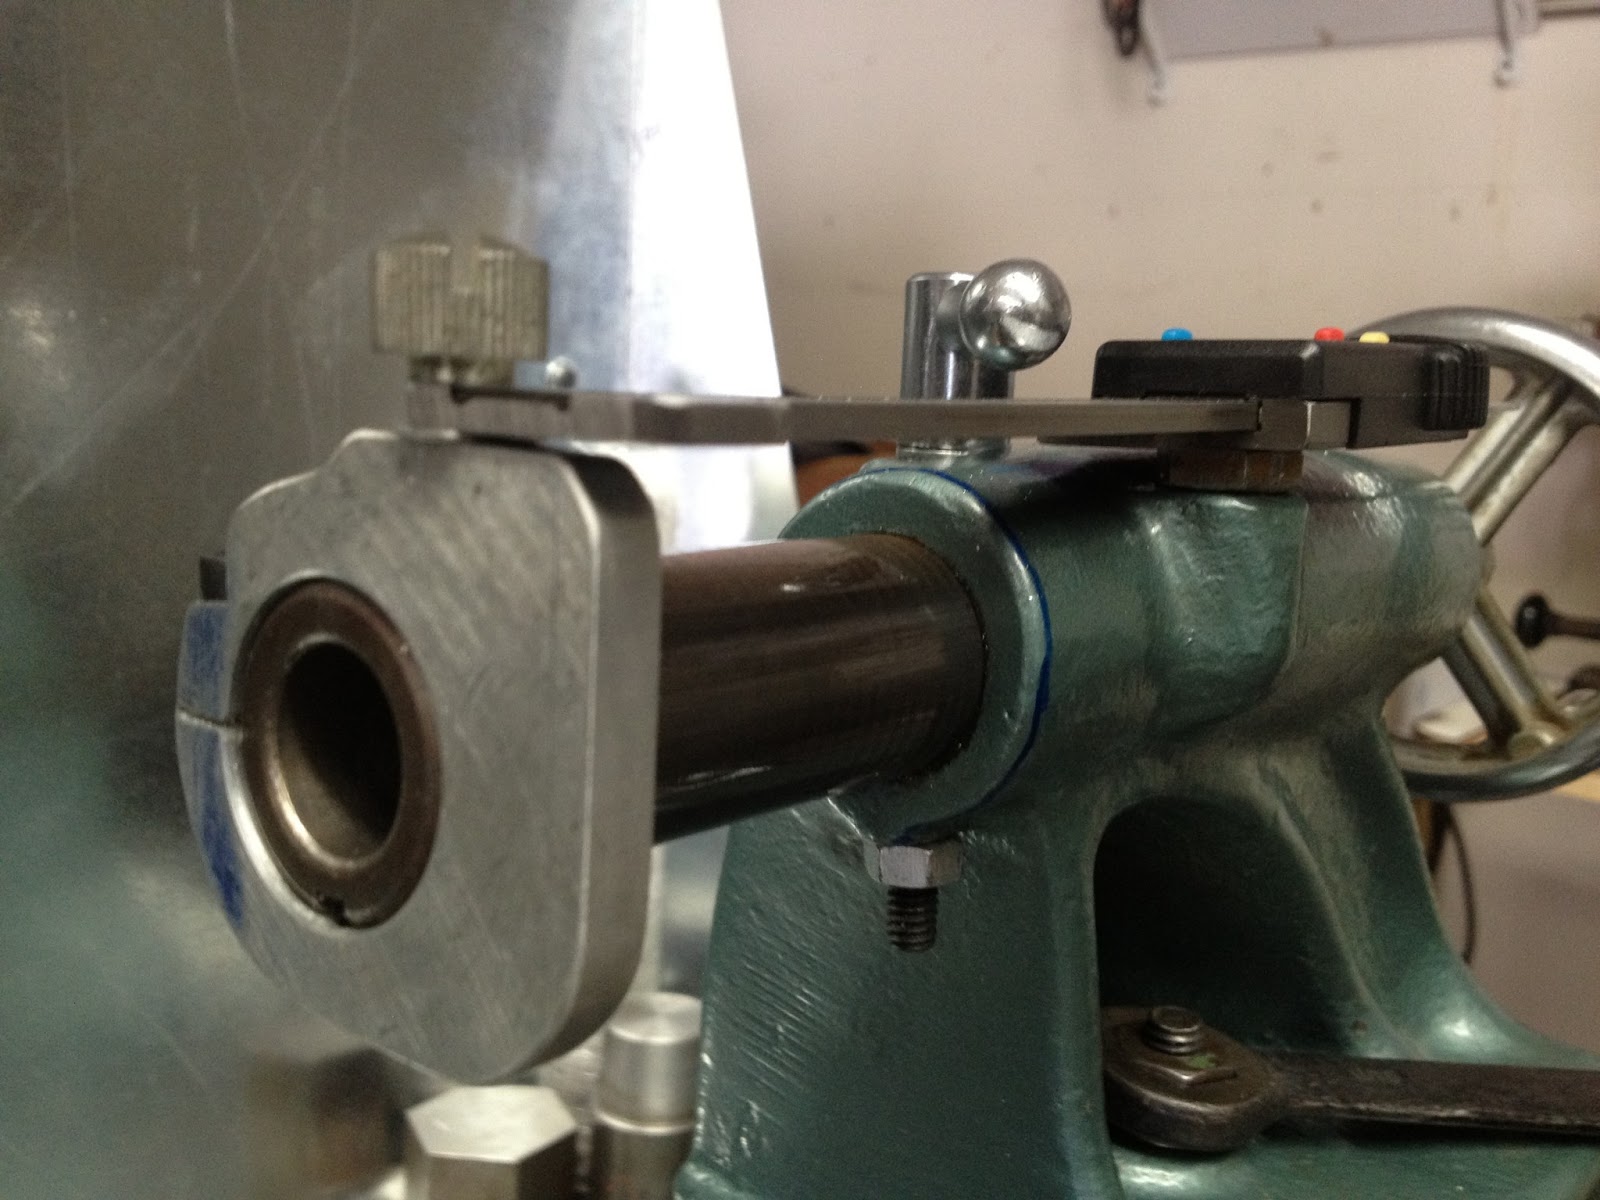
I moved the DRO to the back It was Ok in the front except.
(1) The saddle assembly/Tool post sometimes hit it. losing me some clearance.
(2) The DRO faced straight up and not at the operator. Viewing it was not natural.
(3) Basically it just seemed to get in the way. :/
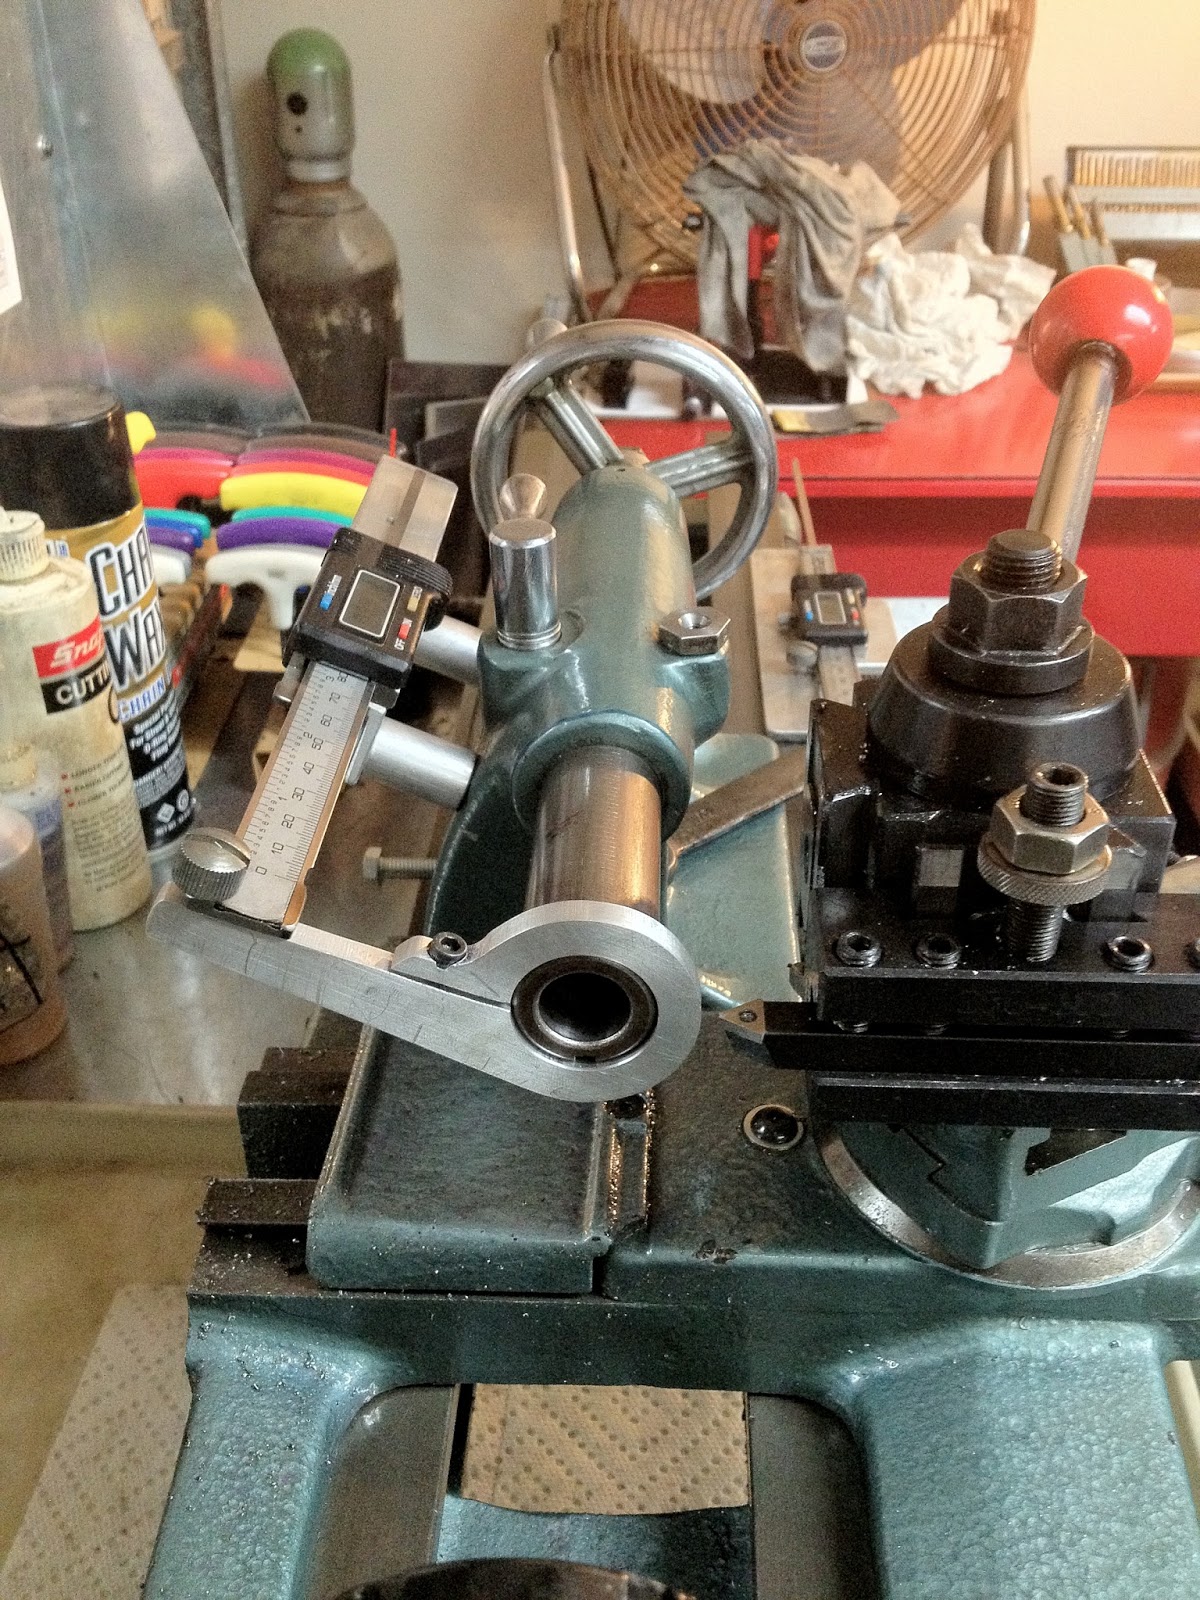
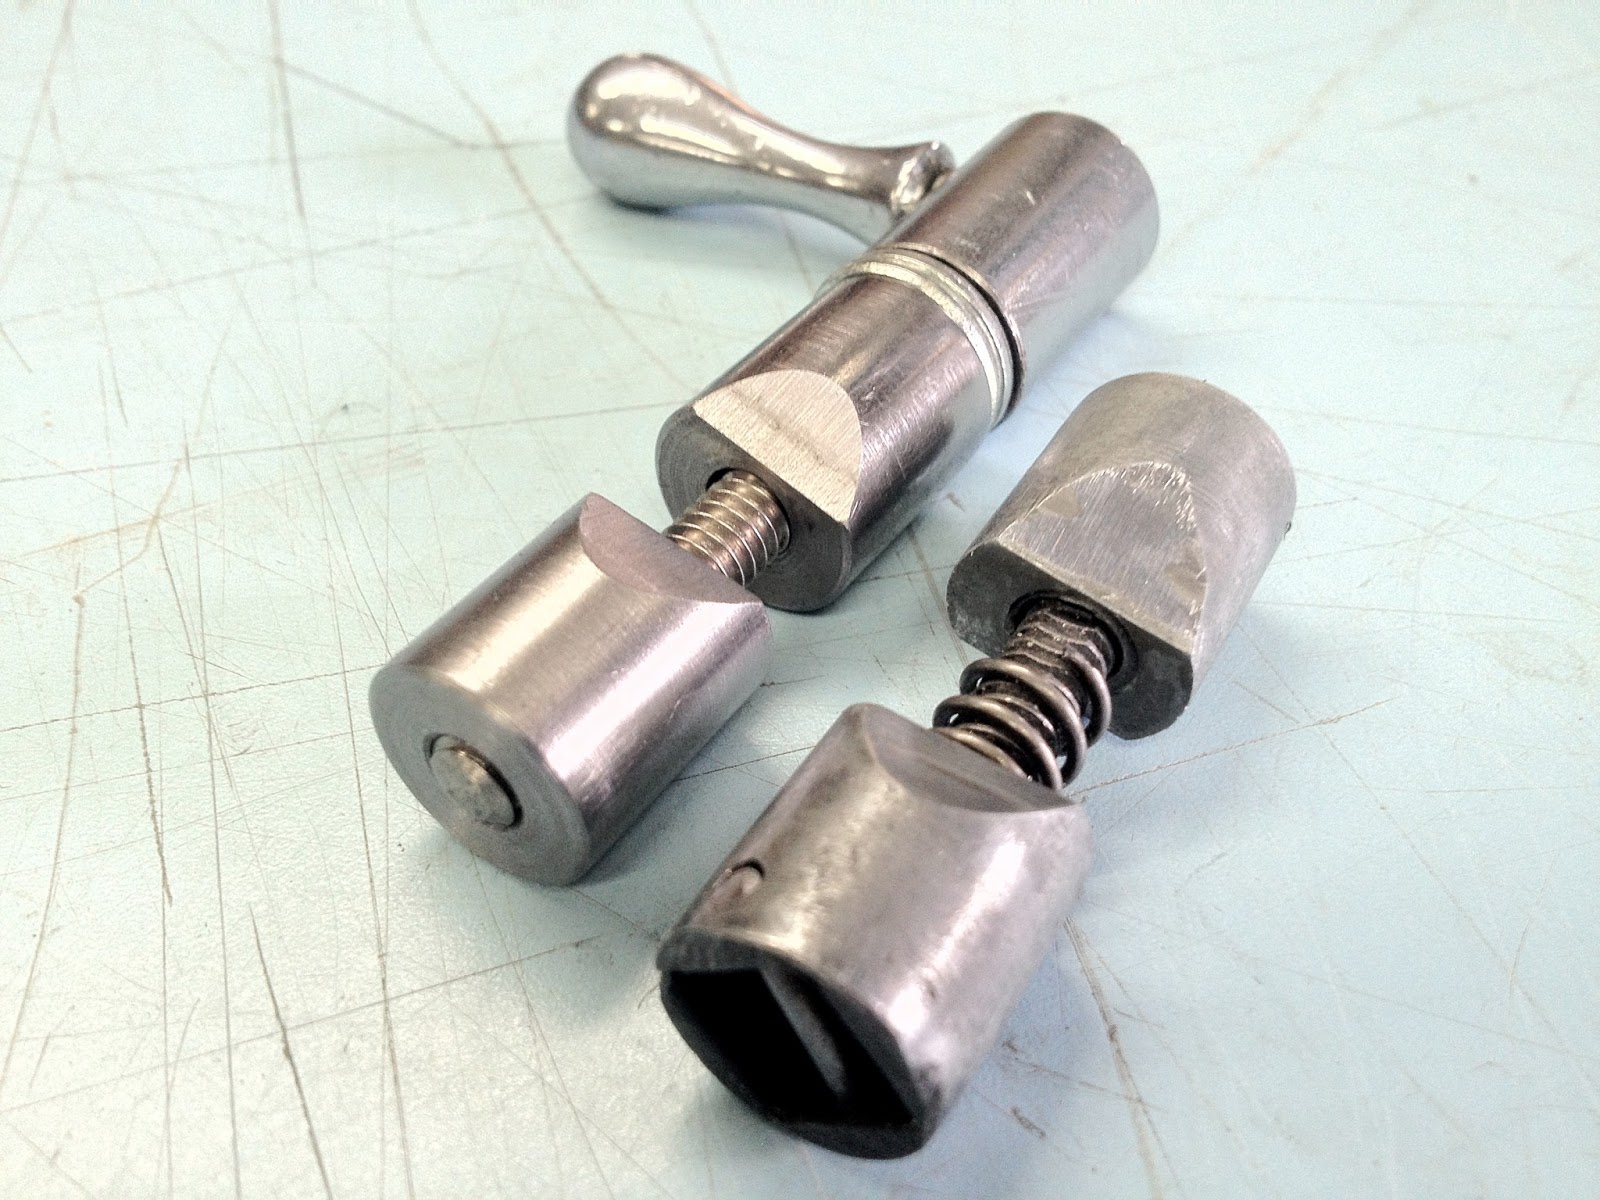
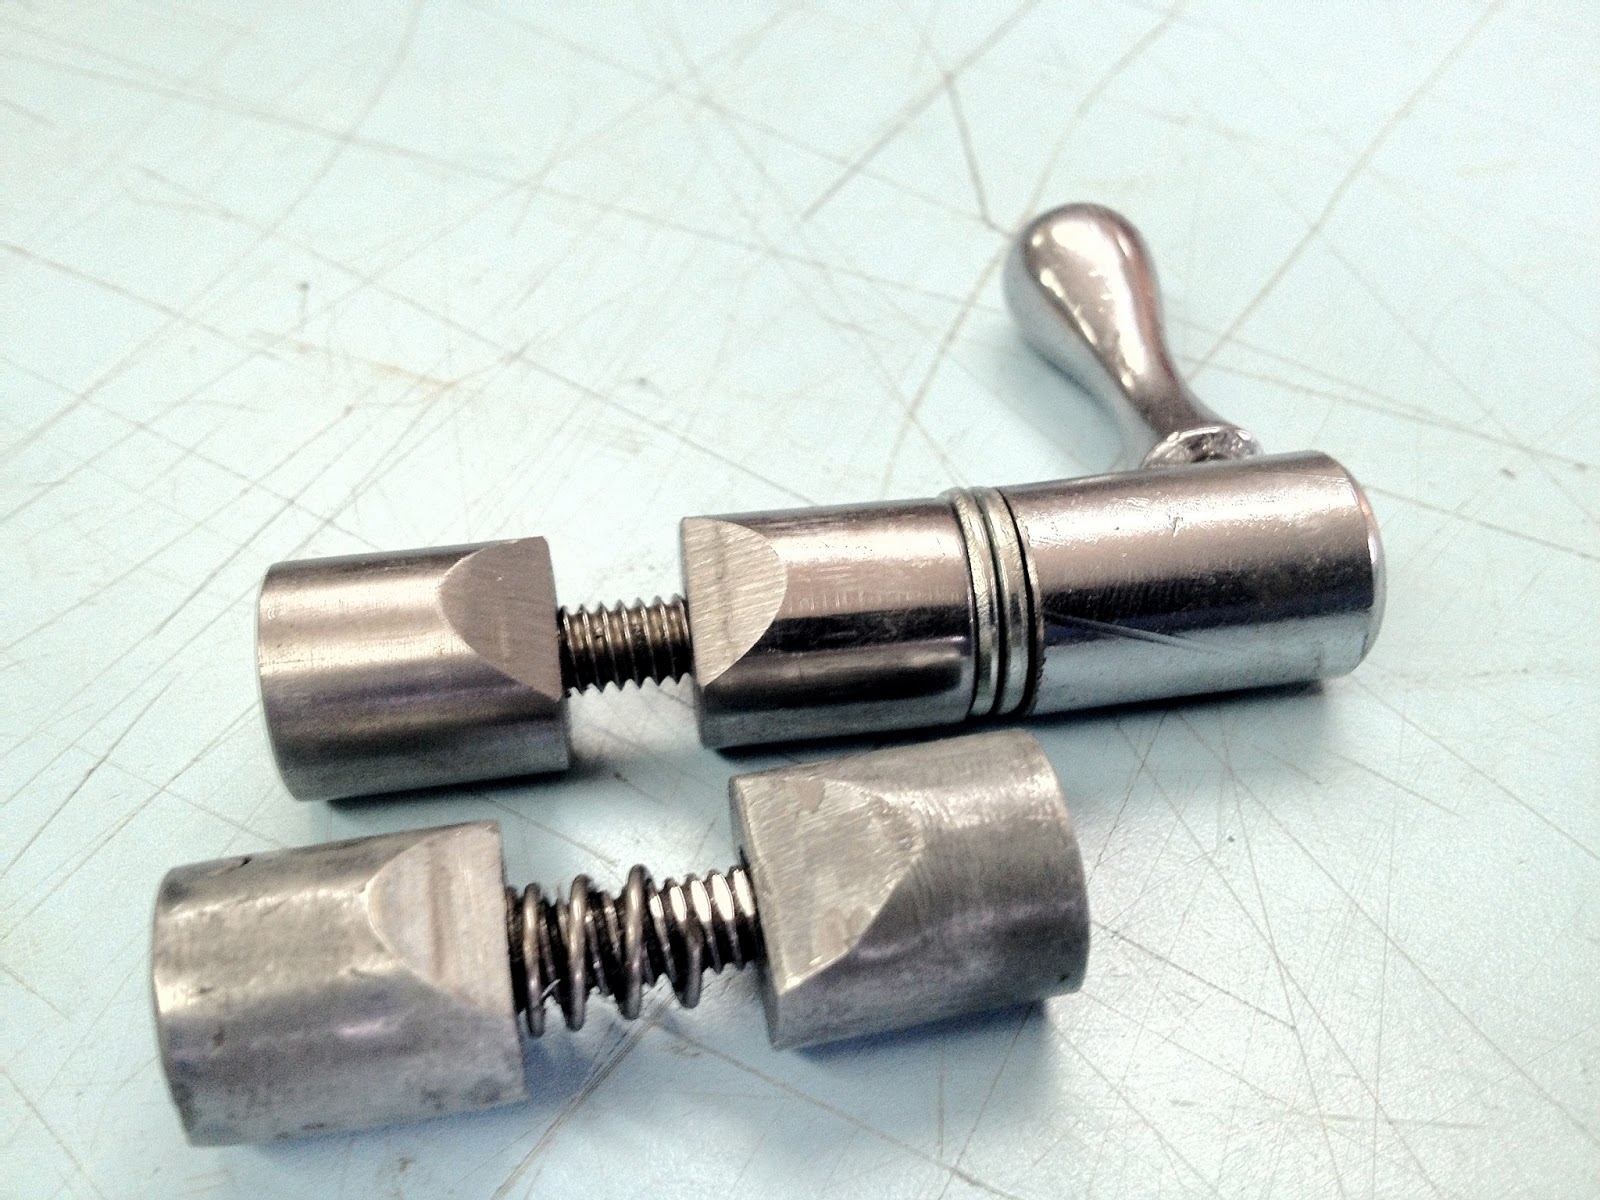
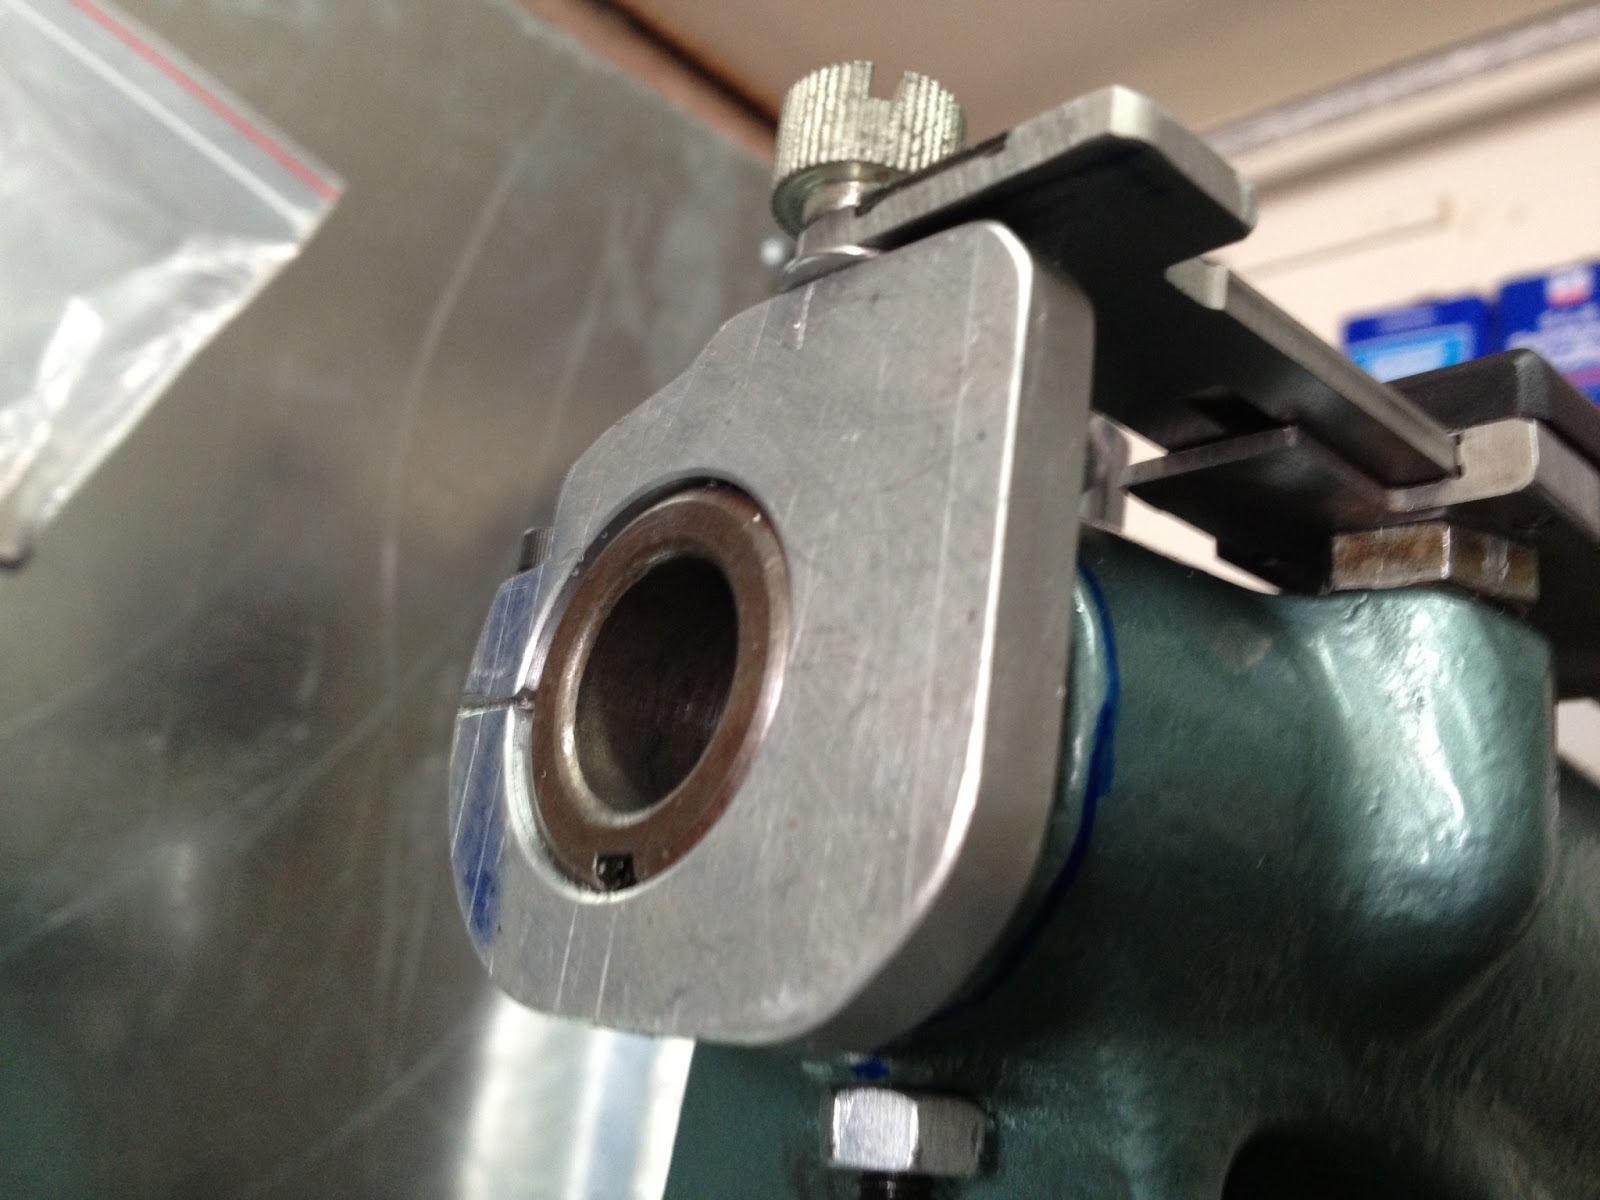
Also, my Ram Lock assembly wasnt working quite well. So, I built a new cylinder assembly.
The old one was quite sloppy and would get stuck in the hole/cylinder. Due to the part
being mal-formed.
The new one was cut from some mild steel stock. Probably the same material you would get at a home depot or similar hardware supplier. I turned it down to 0.624 and drilled the top half 0.25 all the way thru. On the lower half I decided on tapping it to 1/4-20. Then I cut a piece of all thread SS(what I had on hand). and cut to fit.
Last step I cut/sanded a 30 degree(ymmv) angle to satisfy the ram mating. (I just hand sanded it it took all of 2 mins tops! NASA would not approve.) the cylinder part I polished up with some 320grit. I wanted it smooth.
Oh and so far the spring is not necessary.
It does perform as expected now.
Last thing you can just tell/see from the pics. but Ill take some more pics.
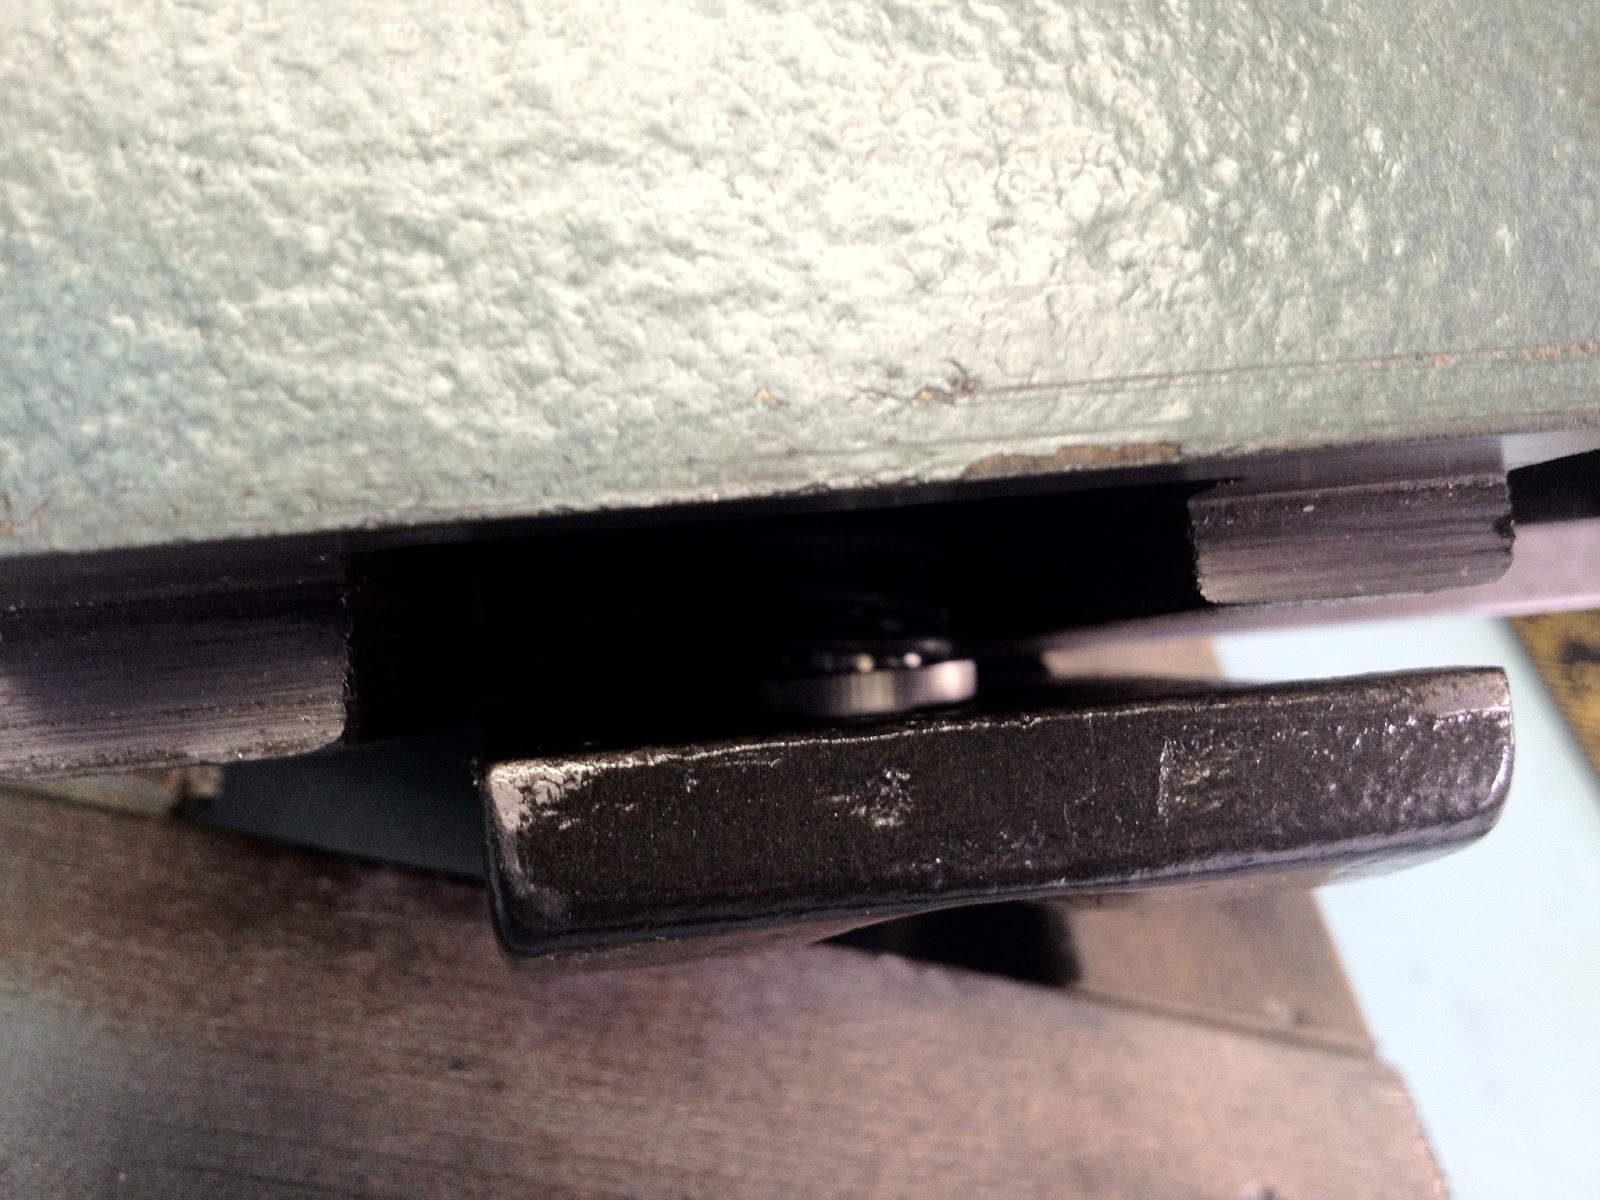
I added a spring to the lower lock assembly so now without removing the wrench I can lock and unlock the tailstock before it took several wrench moves. great mod I just need to add some more pics.
I thought about adding a wheel to my TS but honestly I dont think I would ever use it since I almost live and die by my HF DRO. but who knows maybe one day.


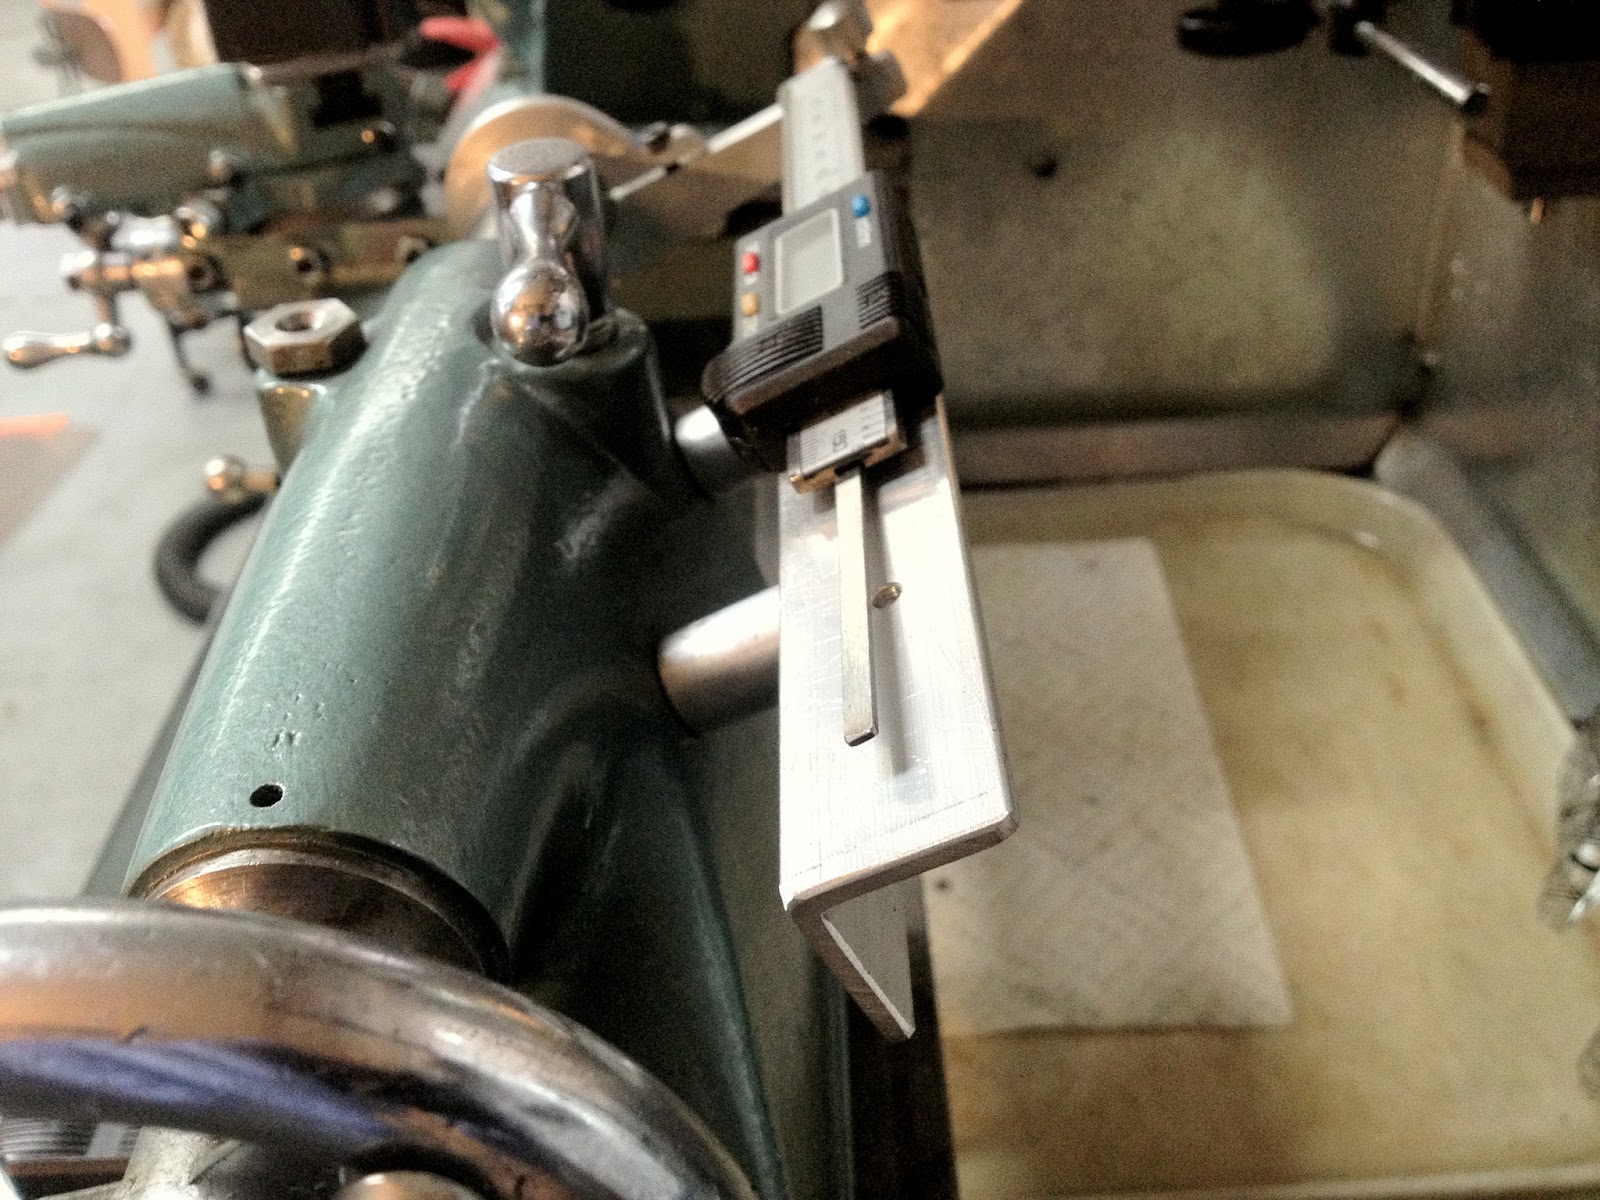
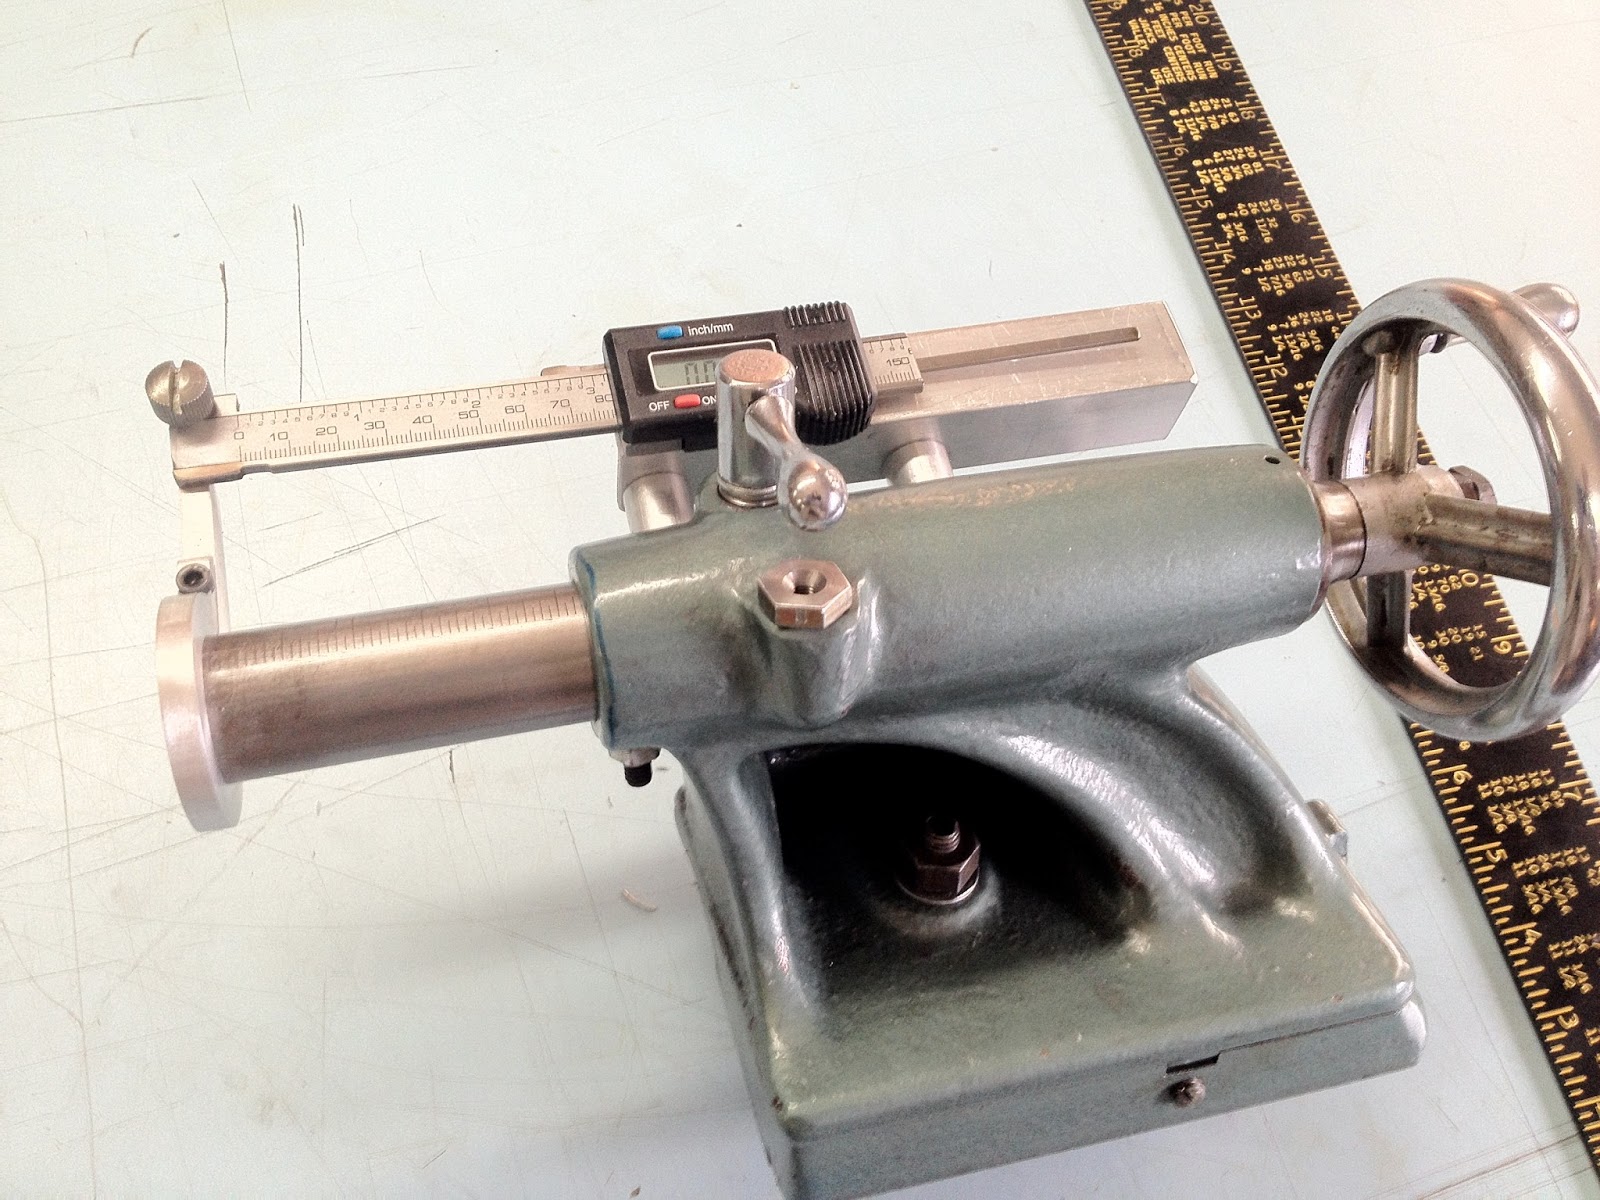


You can get rid of the tail section very easily and it wont affect the digital scale.
Martin, I considered cutting it off. then I had one of them moments where I wasn’t sure if their would be consequences. I tend to jump before looking. Ill take your advice and cut it off now. its only ben a few years. 🙂
I disassembled the plastic part and removed it w/out cutting anything, you can clean it up at the same time, those chinese calipers are often full of filings.
Martin, I always clean up the calipers and on some of them I even go as far as to do a quick lapping. some of them are quite rough when new. a quick lapping sure makes them smooth. some require more lapping than others. -Sam