Laser Chiller aka: ice cube chiller pt1
My new Cube chiller mod hack etc… In need of a reliable and some what inexpensive chiller and having trolled the inter webs for an untold amount of time. I found a user who hacked a tabletop ice cube maker. So I endeavored my own. Ill need to post up more pics. But it goes like this.
One more thing. here is where I got the inspiration from. thanks to you!
Parts list:
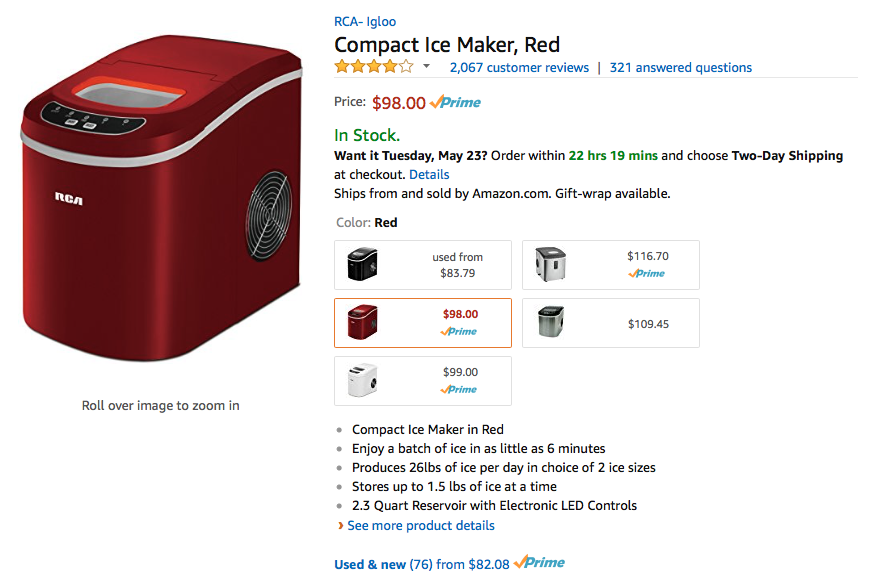
- 1 Cube machine: 98.00
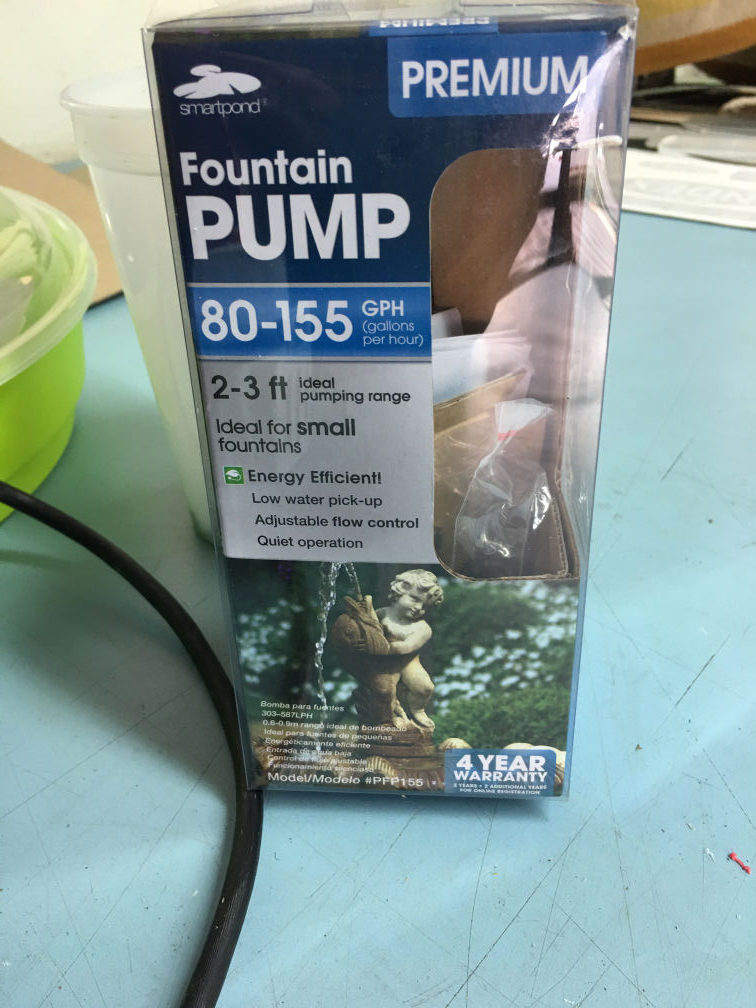
- 1 Fountain pump: 30.00
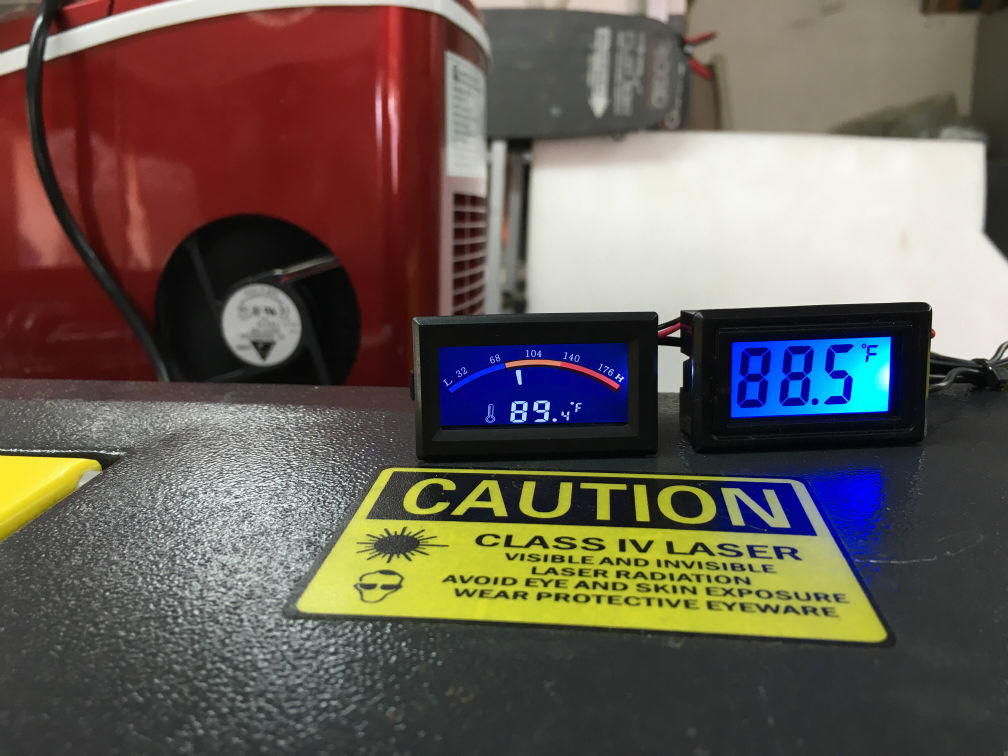
- 2 Temp gages: @12.00 each
- 1 Temp controlled relay: 20.00
- 1 fluid flow block: Included with temp gages.
- 1 gallon of antifreeze. (I used Peak RV)
- approx cost of project 200.00 +/-
Pics below ar the temp gages I bought off eBay. they both came with flow blocks I chose 2 different types to see which one I would like the most. (The one on the left is my preferred choice)
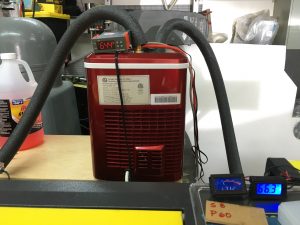
I also setup the gages in 3 locations. for the cube chiller its probe is inside the chiller it self. as for the two you see here one measures the fluid going into the tube…. and the other after the tube.
In the below pic you can see the fan grill is missing. First I replaced the built in fan for one which move twice the air. so I had to open up the hole ah bit. and still need to find a suitable grill.
After several pumps I settled on this one. it was inexpensive, fit inside the chiller. and flowed quite a bit.
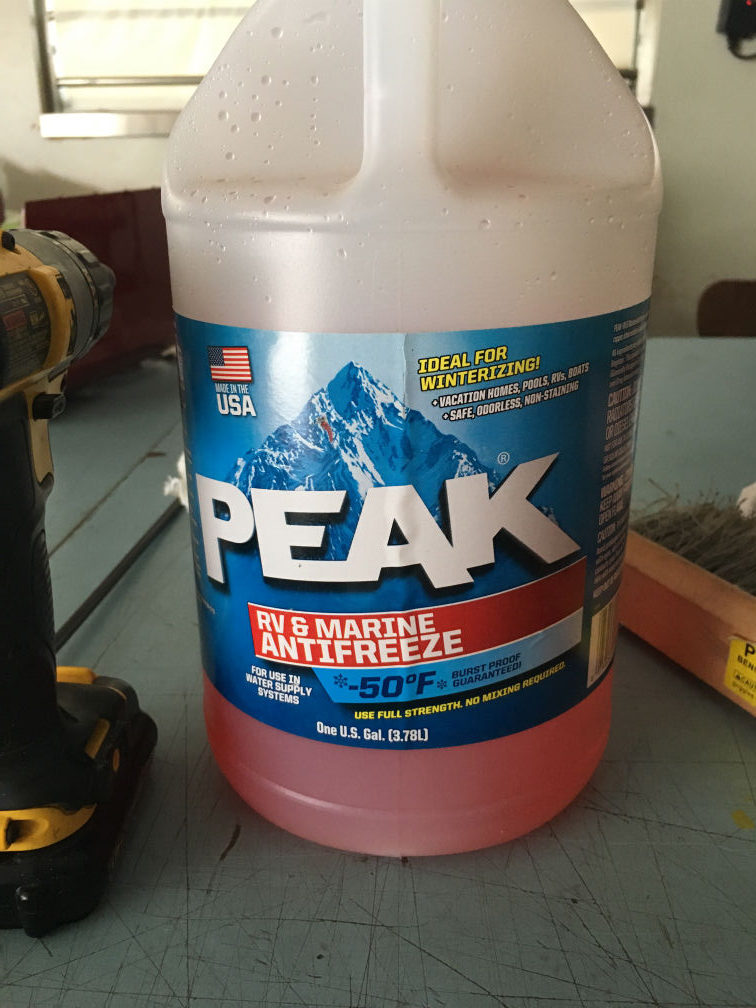
This is my choice of coolant.
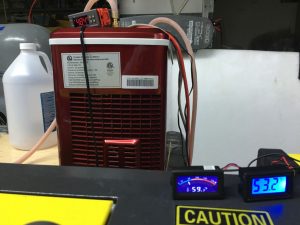
If you look atop the chiller you can see the temperature controlled relay.
You can just see the ring washer where the fluid enters the cube maker.
Above: you can see the flow block (temp prob is inside the block) I tried some armor flex over the silicone fluid lines. here in FLA the humidity is so high that condensation is rampant. this thing gets down to low 30’s in a hurry.
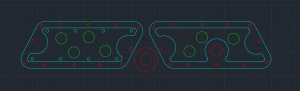
Chiller spray head cad file image. (Cad file available on/by request)
(Above) 3 pcs. the 2 parts bolt together to form a manifold of sorts. the fluid enters thru the main hole (see red hole on right part.) then fills the cavity and exits opposite holes. that pour down on the cooling rail inside the cube maker. the 3rd part red ring in the middle Is a washer. easy part to make on the laser. operations are cut to remove excess plastic or creat the void. (not a full thru cut). then cut the 3 parts. thread the one part to accept a brass pipe fitting. then bolt the two halfs together. I used SS hardware.
The unit is complete and in its final resting place under my laser. it looks nice now I have still to make some sort of control panel for the gages. but other wise it works fabulous.
Ill have to post up my cad drawing for the mods I did to the ice cube maker it self. as well as a schematic for the temp controller.
I will say would I do this again? HELL YEA!
my previous chiller which I made cost me in the area of about 500.00 it looks cool as hell but for performance? does not even compare to this setup. as well as it takes up way more space.
-S
I just read your how to and it was great. I’m looking forward to working on this mod on my own laser. I also live in FL and as you know the heat in my garage, aka my shop, can get really high. For the last few years I have been using a Styrofoam cooler with those blue Ice packs and I am constantly changing the ice packs to keep the laser temp low. I think this new method is just what I need to solve the laser cooling issue. Thank you both, Sam and Thevisad, for this great solution. I’ll let you know how it works out for me.
Evening
Your idea and thoughts have been a big help in going the route of the Ice maker laser tube cooler. With no modifications just pumping water through the tube and letting it return to the cooling tray. As well as letting the ice maker run its own cycles for making ice, my k40 keeps cool. I am ready now to modify the unit with a controller and inlet header. I am wondering if you are still using the system? As well as if you have other modifications ideas?
Dennis, Yes, I still use the laser I have made so many mods that in truth for me their just improvements. I often get so caught up in the projects that the mods get forgotten.
So im not sure what info I can offer up. Im guessing your in Canada? Im in Fla.
-S
Yup I am in the Great White North. Central Alberta. I am using the unit without a controller and just turning the ice maker on/off at certain temperatures. It sure beats frozen water bottles. I have ordered a cheap Chinese temperature controller and will see how that works. Might also build a arduino based controller.
Very happy I stumbled across this idea of the Ice Maker. Shocked no one else is promoting this method. Enjoy the day. 🙂
Sweet setup! What percentage mix of antifreeze and distilled water do you use?
Thanks for the detailed write up!
John,
I try and use as much Antifreeze possible. and then top up the rest with water. my system has aprox 2-3 gallons total? And thanks! -S
Very nice Project, is your cad file still available.
?
yes I think its on the same page for dl? Ill look if Not Ill email it to you 🙂